Refreshing the appearance of your home's exterior often means turning attention to those often-overlooked elements that quietly protect your property year-round. Zinc gutters, whilst remarkably durable and resistant to the elements, can begin to look tired or may simply need a colour update to complement a newly decorated facade. Whether you're a complete novice to home improvement or simply seeking a straightforward approach to enhancing your rainwater systems, this comprehensive guide will walk you through every stage of the painting process with clarity and confidence. From initial surface preparation through to long-term care, you'll discover practical techniques that ensure a professional-looking finish without the need for specialist experience.
Preparing your zinc gutters for painting
The foundation of any successful painting project lies in meticulous preparation, and zinc gutters are no exception to this golden rule. Before you even think about opening a tin of paint, you must ensure that the surface is completely clean and free from any contaminants that might compromise adhesion. Begin by giving your gutters a thorough scrub using hot water mixed with a quality detergent, working along the entire length to dislodge accumulated dirt, moss, and general grime. A wire brush proves invaluable for this stage, particularly for reaching into corners and removing stubborn deposits that have built up over months or years of exposure to the elements. Once you've completed the initial wash, it's worth wiping down the entire surface with a lint-free cloth dampened with turpentine, ammonia, or naphtha to eliminate any residual oils or waxy substances that naturally form on galvanised steel and zinc surfaces.
Cleaning and removing debris from the surface
After the chemical cleaning stage, you'll want to address any rust spots or areas where the original finish has begun to deteriorate. A scouring pad works wonders for these localised problem areas, gently abrading the surface without causing excessive damage to the underlying metal. If you encounter sections where paint is already flaking or peeling, use your wire brush once more to remove all loose material, ensuring you're left with a sound base for your new coating. Don't rush this stage, as any shortcuts taken during preparation will inevitably show through in the final result. For those working with older guttering that has weathered considerably, you might consider a light sanding with fine-grade sandpaper to create a slightly roughened texture that helps paint grip more effectively. Remember to rinse away all dust and debris with clean water after this mechanical preparation, then allow the gutters to dry completely before moving forward. Resources like those found at villaauristela.es often emphasise that patience during preparation saves considerable time and frustration later in the project.
Selecting the right zinc-specific primer
Once your gutters are impeccably clean and dry, the next critical decision involves choosing an appropriate primer designed specifically for metal surfaces. Standard primers simply won't provide the necessary adhesion to zinc or galvanised steel, so you must invest in a product formulated to bond with these challenging substrates. Metal primers typically contain compounds that chemically react with the zinc coating, creating a stable foundation for subsequent paint layers. For newer zinc gutters, an etch primer proves particularly effective, whilst older, weathered installations might benefit from a modified zinc phosphate solution sometimes referred to as T-Wash in professional circles. When selecting your primer, ensure compatibility with your chosen topcoat, ideally purchasing both products from the same manufacturer to guarantee optimal performance. Apply the primer using a quality synthetic brush, working it thoroughly into the surface with smooth, even strokes that avoid leaving heavy brush marks. The primer layer should appear uniform and consistent, without any thin patches or areas where the metal shows through. Allow this crucial basecoat to dry completely according to the manufacturer's instructions before proceeding to the painting stage, as rushing this curing period can compromise the entire project.
Applying paint to your gutters properly
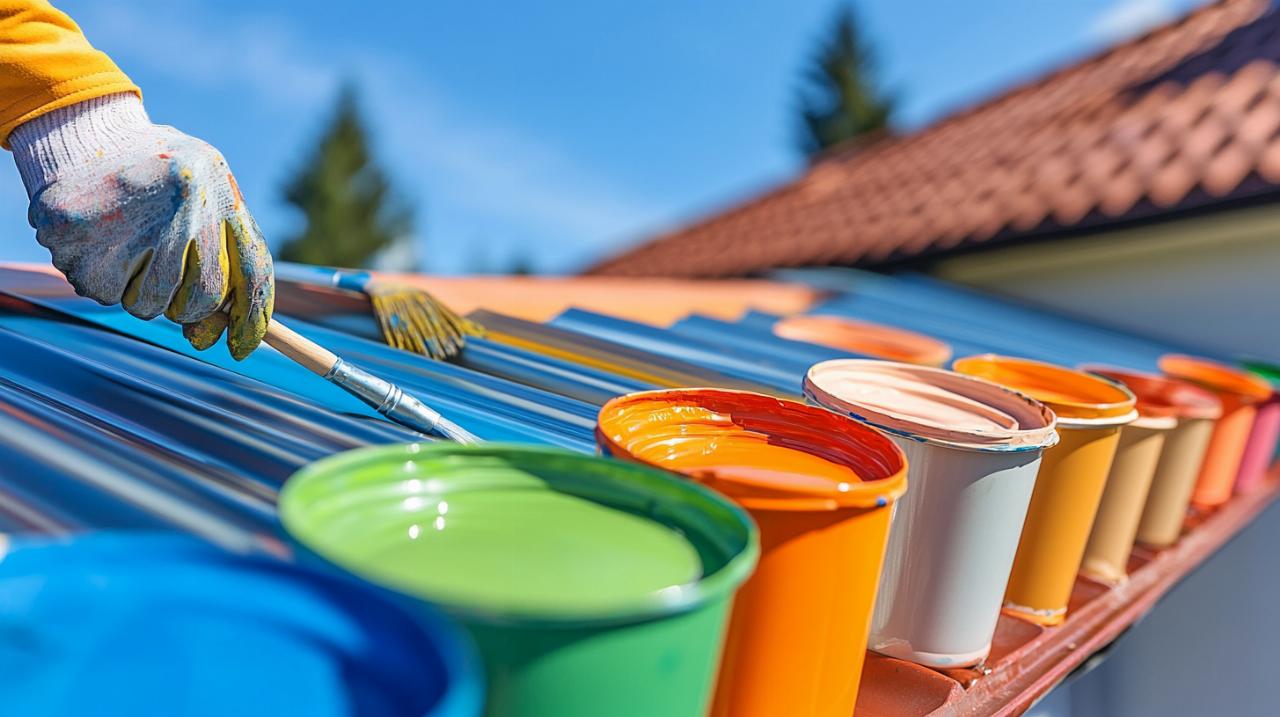
With preparation complete and your primer fully cured, you're now ready to transform your gutters with a fresh coat of colour. This stage requires patience and technique rather than speed, as building up thin layers consistently delivers far superior results to attempting coverage in a single heavy application. Before you begin, ensure you've selected appropriate weather conditions for exterior painting, avoiding days when rain threatens or when direct sunlight will cause the paint to dry too rapidly. Position your ladder securely and comfortably, allowing you to work methodically along the gutter length without overstretching or compromising your safety. Have all your materials within easy reach, including your paint, brushes or rollers, and clean cloths for addressing any drips or runs before they set.
Choosing suitable exterior paint and application methods
The paint you select must be specifically formulated for exterior metal use, with acrylic latex varieties generally offering excellent durability and weather resistance for guttering applications. Products such as Zinsser Allcoat Exterior provide versatile coverage and come in various finishes including gloss, satin, and matt, allowing you to match your desired aesthetic. For those working with metal gutters requiring additional rust protection, Rust-Oleum Combicolor Metal Paint incorporates anti-rust properties that extend the life of your installation whilst delivering an attractive finish. When it comes to application method, synthetic brushes like the Hamilton Prestige range work beautifully with water-based paints, allowing precise control around brackets and joints. For longer runs of guttering where you've opted for a gloss or satin finish, consider using a mini-roller such as the Wooster Jumbo-Koter RedFeather model, which delivers smooth, consistent coverage without the brush marks that can sometimes appear with traditional application methods. Pour a manageable amount of paint into a suitable container, working from this rather than the original tin to avoid contaminating your main supply.
Mastering the technique of thin, even coats
The secret to a professional-looking finish lies in building up coverage gradually through multiple thin coats rather than attempting to achieve opacity in a single thick application. Load your brush or roller moderately, removing excess paint against the edge of your container to prevent drips and runs. Begin at one end of the gutter and work systematically towards the other, maintaining a wet edge to avoid visible join lines where sections meet. Your strokes should be smooth and deliberate, spreading the paint evenly without overworking any particular area. If you notice runs beginning to form, address them immediately with a lightly loaded brush before they have chance to set. Once you've completed the first coat, step back and inspect your work from ground level, checking for any missed spots or thin areas that might need attention. Allow this initial layer to dry completely according to the manufacturer's guidelines, resisting any temptation to apply the second coat prematurely. When the first coat has cured, lightly inspect the surface and apply your second coat using the same methodical approach. This layer typically requires less material than the first and should flow on more easily, delivering the depth of colour and protection you're seeking. For most quality exterior paints, two coats prove sufficient, though particularly light colours applied over dark surfaces might benefit from a third application.
Safety considerations when painting gutters
Whilst painting gutters might appear straightforward, the elevated nature of the work introduces hazards that demand respect and proper precautions. Never compromise on safety equipment or working practices in an effort to save time or money, as the consequences of a fall or injury far outweigh any such savings. Before you commence work, ensure you're physically comfortable working at height and that weather conditions are suitable, avoiding windy days when ladders become unstable or your balance might be compromised. Plan your work to avoid fatigue, taking regular breaks to rest and reassess your position rather than pushing through discomfort that might lead to mistakes.
Essential protective equipment for the job
Your hands and eyes require particular protection throughout the painting process, especially when working with primers and solvents during the preparation stage. Quality gloves fashioned from nitrile or similar chemical-resistant materials shield your skin from potentially irritating substances whilst maintaining the dexterity needed for precise brushwork. Safety glasses or goggles prove absolutely essential, particularly if you're using a paint sprayer for application, as fine droplets can easily reach your eyes when working overhead. When working with cleaning chemicals like turpentine or ammonia, ensure adequate ventilation even though you're working outdoors, as concentrated vapours can cause discomfort and potential health issues with prolonged exposure. Consider wearing older clothing or a decorator's overall that covers your arms and legs, protecting both your skin and your regular wardrobe from inevitable splashes and drips. If you're working on a particularly lengthy or complex gutter system, a dust mask or respirator might prove beneficial during sanding stages, preventing inhalation of fine metal particles that can irritate respiratory passages.
Working safely at height on ladders
Your ladder represents the most significant safety consideration for this entire project, so selecting appropriate equipment and positioning it correctly cannot be overstated. Use a sturdy extension ladder that extends at least one metre above the gutter height, providing secure handholds when you're mounting and dismounting. Position the ladder at the correct angle, roughly one metre out from the wall for every four metres of height, and ensure both feet rest on firm, level ground rather than soft soil or loose paving that might shift under load. If possible, have someone foot the ladder whilst you're working, providing additional stability and peace of mind. Never overreach whilst painting, as this shifts your centre of gravity and dramatically increases the risk of toppling. Instead, climb down and reposition your ladder frequently, maintaining three points of contact whenever you're ascending or descending. Consider investing in ladder stabilisers that spread the load across a wider area of gutter and prevent the ladder from slipping sideways during use. If your property features particularly high or awkwardly positioned guttering, seriously consider hiring professionals rather than risking injury through unsafe working practices.
Timing and Weather Conditions for Best Results
Successfully painting exterior metalwork depends as much on environmental conditions as it does on technique and preparation. Paint chemistry requires specific temperature and humidity ranges to cure properly, and zinc gutters present particular challenges due to their exposed location and susceptibility to rapid temperature changes. Understanding these factors and planning your work accordingly ensures optimal adhesion, durability, and appearance for years to come. Check weather forecasts thoroughly before commencing work, looking ahead several days to ensure stable conditions throughout the painting and curing period.
Avoiding rain and excessive moisture
Moisture represents the primary enemy of exterior painting projects, with rain, heavy dew, or high humidity all capable of ruining your work. Never paint gutters if rain appears likely within the next twenty-four hours, as even light precipitation can wash away uncured paint or cause it to run and streak unsightly. Similarly, avoid painting early in the morning when heavy dew coats surfaces, as this moisture prevents proper adhesion and can become trapped beneath the paint film, leading to premature failure. High humidity levels above seventy-five percent also prove problematic, extending drying times dramatically and potentially causing paint to sag or develop a rough texture as it struggles to cure. The ideal painting conditions feature moderate temperatures between ten and twenty-five degrees Celsius with humidity levels comfortably below seventy percent. If you live in a region prone to sudden weather changes, consider starting your project early in the day to maximise the stable weather window, allowing your first coat to achieve a reasonable cure before evening temperatures drop and humidity rises. Remember that multiple thin coats require multiple good weather days, so plan accordingly rather than attempting to rush the process during questionable conditions.
Understanding why direct sunlight affects drying
Whilst you might assume sunshine represents ideal painting weather, direct sunlight actually creates significant challenges for gutter painting projects. When paint dries too quickly under intense UV radiation and heat, the surface can skin over whilst the underlying layers remain wet, trapping solvents and preventing proper curing. This rapid surface drying often leads to cracking, poor adhesion, and an uneven finish that looks unprofessional and fails prematurely. Additionally, working in direct sunlight makes the paint less workable, causing it to become tacky before you've properly spread and smoothed each section. The metal gutters themselves heat up considerably in sunshine, accelerating the drying process further and making it nearly impossible to maintain a wet edge for seamless blending. Instead, aim to paint gutters in overcast conditions or during times of day when your property's orientation places them in shade. If you must work in sunshine due to scheduling constraints, follow the shade around your property, painting only those sections currently protected from direct rays. This approach requires more setup and repositioning of equipment but delivers markedly superior results compared to battling against rapid drying conditions. Some experienced decorators deliberately plan gutter painting for autumn or spring when temperatures remain moderate and the lower sun angle reduces direct exposure, creating naturally ideal conditions for exterior metalwork projects.
Long-term maintenance and care
Completing your gutter painting project represents an achievement worth celebrating, but your work doesn't end once you've applied that final coat. Proper ongoing maintenance ensures your efforts remain evident for years to come, protecting both the aesthetic appeal and the functional integrity of your rainwater systems. Establishing a regular inspection routine and addressing minor issues promptly prevents small problems from escalating into costly repairs or complete repainting jobs. The time invested in periodic checks and touch-ups proves minimal compared to the satisfaction of maintaining beautifully presented guttering that enhances your property's kerb appeal.
Regular inspection and touch-up techniques
Schedule thorough gutter inspections at least twice annually, typically in spring and autumn when you're also clearing accumulated leaves and debris. During these examinations, look carefully for any chips, scratches, or areas where the paint has worn through to expose bare metal beneath. These vulnerable spots require immediate attention, as exposed zinc quickly develops surface oxidation that compromises both appearance and protection. Keep small quantities of your original paint properly sealed for these touch-up jobs, ensuring colour consistency when addressing damaged areas. Before applying touch-up paint, clean the affected area thoroughly and lightly sand around the edges of any chips to feather the existing paint, creating a smooth transition that will be less noticeable once repaired. For minor scratches, a small artist's brush allows precise application without affecting surrounding areas, whilst larger damaged sections might require masking tape to achieve clean edges. If you discover cracks in the gutter material itself, products like Rust-Oleum Fillcoat Fibres Waterproofing sealant can repair these structural issues before they develop into leaks, with the repaired area then painted to match the surrounding finish. Consider installing gutter guards or similar protective systems that reduce the accumulation of debris and minimise physical damage from falling branches or extreme weather events. These additions prove particularly valuable for properties with significant tree coverage or those located in areas prone to severe storms.
Understanding warranty implications before you start
Before you commit to painting your gutters, take time to review any warranties or guarantees that currently cover your rainwater systems. Many manufacturers explicitly state that painting their products voids all warranty protection, leaving you entirely responsible for any subsequent failures or issues. This proves particularly relevant for newer installations where substantial warranty periods remain valid, as painting immediately after installation sacrifices years of potential manufacturer support for purely cosmetic reasons. If your gutters are relatively new and you're considering painting them simply for aesthetic purposes, carefully weigh whether the colour change justifies surrendering your warranty protection. Contact the manufacturer directly if warranty documentation proves unclear, obtaining written confirmation of their position regarding painting before you proceed. For gutters approaching or beyond their warranty period, this consideration becomes less significant, though you should still document the product specifications and any relevant terms for your records. Some premium gutter systems feature factory-applied finishes specifically engineered for longevity and performance, with painting actually reducing their effectiveness and lifespan compared to the original coating. In these situations, professional re-coating services using manufacturer-approved materials might prove available, maintaining warranty coverage whilst achieving your desired appearance. The modest additional cost of such professional services often proves worthwhile when compared to the value of retained warranty protection and the assurance of appropriate materials and application methods.